Plastic drainage channels play a crucial role in effectively managing surface water, preventing flooding, and protecting your property. Installing these channels correctly is essential to ensure both functionality and aesthetic appeal. This article provides a comprehensive step-by-step guide on how to install plastic drainage channels, highlighting their importance and offering valuable maintenance tips.
Plastic drainage channels come in various shapes, sizes, and colors, allowing you to choose an option that blends seamlessly with your outdoor design. They can be customized to match the surrounding landscape, providing a visually appealing solution.
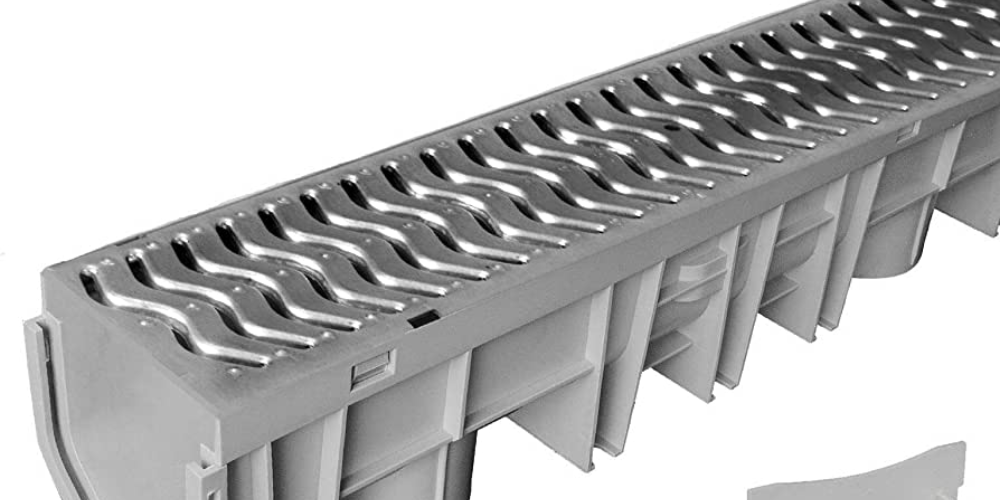
Apart from their visual appeal, plastic drainage channel offers excellent functionality. They efficiently collect and channel water away from the surface, preventing water buildup and potential damage. The right drainage channel can withstand heavy loads, ensuring durability and long-term effectiveness.
Types of Plastic Drainage Channels
Plastic drainage channels are available in different shapes, including linear, square, and slot channels. Linear channels are often used in residential applications, while square and slot channels are commonly used in commercial settings. Each shape offers specific benefits and can be chosen based on the intended purpose and visual appeal.
Consider the load capacity of the plastic drainage channel to ensure it can withstand the expected weight and traffic. This factor is particularly important for areas with heavy vehicles, such as driveways or parking lots. Choosing a channel with appropriate load capacity will ensure its longevity and prevent damage.
The surface finish of plastic drainage channels can vary, providing different levels of slip resistance and water flow capabilities. Some channels have grating or grills to enhance water collection and reduce the risk of slipping. Assess the surface finish options available and select the one that suits your specific requirements.
Step-by-Step Guide to Installing Plastic Drainage Channels
Preparation
Start by preparing the installation area for the plastic drainage channels. Remove any debris, vegetation, or existing paving to create a clean working space. Measure the area and plan the layout of the channels to ensure proper water flow and efficient drainage.
Excavation
Use a shovel or an excavator to dig a trench along the planned layout for the drainage channels. Make sure the trench is deep enough to accommodate the channels, taking into account the recommended depth provided by the manufacturer. The trench should slope downward towards the desired drainage outlet to ensure water flow.
Base Preparation
Create a solid and level base for the drainage channels. Level the bottom of the trench by removing any uneven or loose soil. Compact the soil using a tamper or compactor to ensure stability and prevent future settling. Use a spirit level to ensure the base is even and sloped towards the drainage outlet.
Channel Installation
Carefully place the plastic drainage channels into the prepared trench. Ensure the channels fit securely and align with the planned layout. If multiple channels are required, connect them using the provided connector pieces according to the manufacturer’s instructions. If necessary, trim the channels to the desired length using a saw or a utility knife. Use a rubber mallet to gently tap the channels into place, ensuring they are level and properly seated in the trench.
Connection and Sealing
If connecting the plastic drainage channels to an existing drainage system, ensure a proper connection. Use compatible components, such as connectors and adapters, to securely join the channels to the existing system. It is important to follow the manufacturer’s instructions and recommendations for the specific type of channel being installed. Additionally, apply a suitable sealing compound or adhesive to seal any joints or connections, ensuring a watertight seal.
Conclusion
Installing aesthetically pleasing and functional plastic drainage channels is an important step in managing surface water effectively. By following the step-by-step guide provided in this article, you can ensure a proper installation that enhances both the functionality and appearance of your outdoor spaces. Regular maintenance and care will further prolong the lifespan and performance of the drainage channels, allowing you to enjoy a well-drained and visually appealing environment.